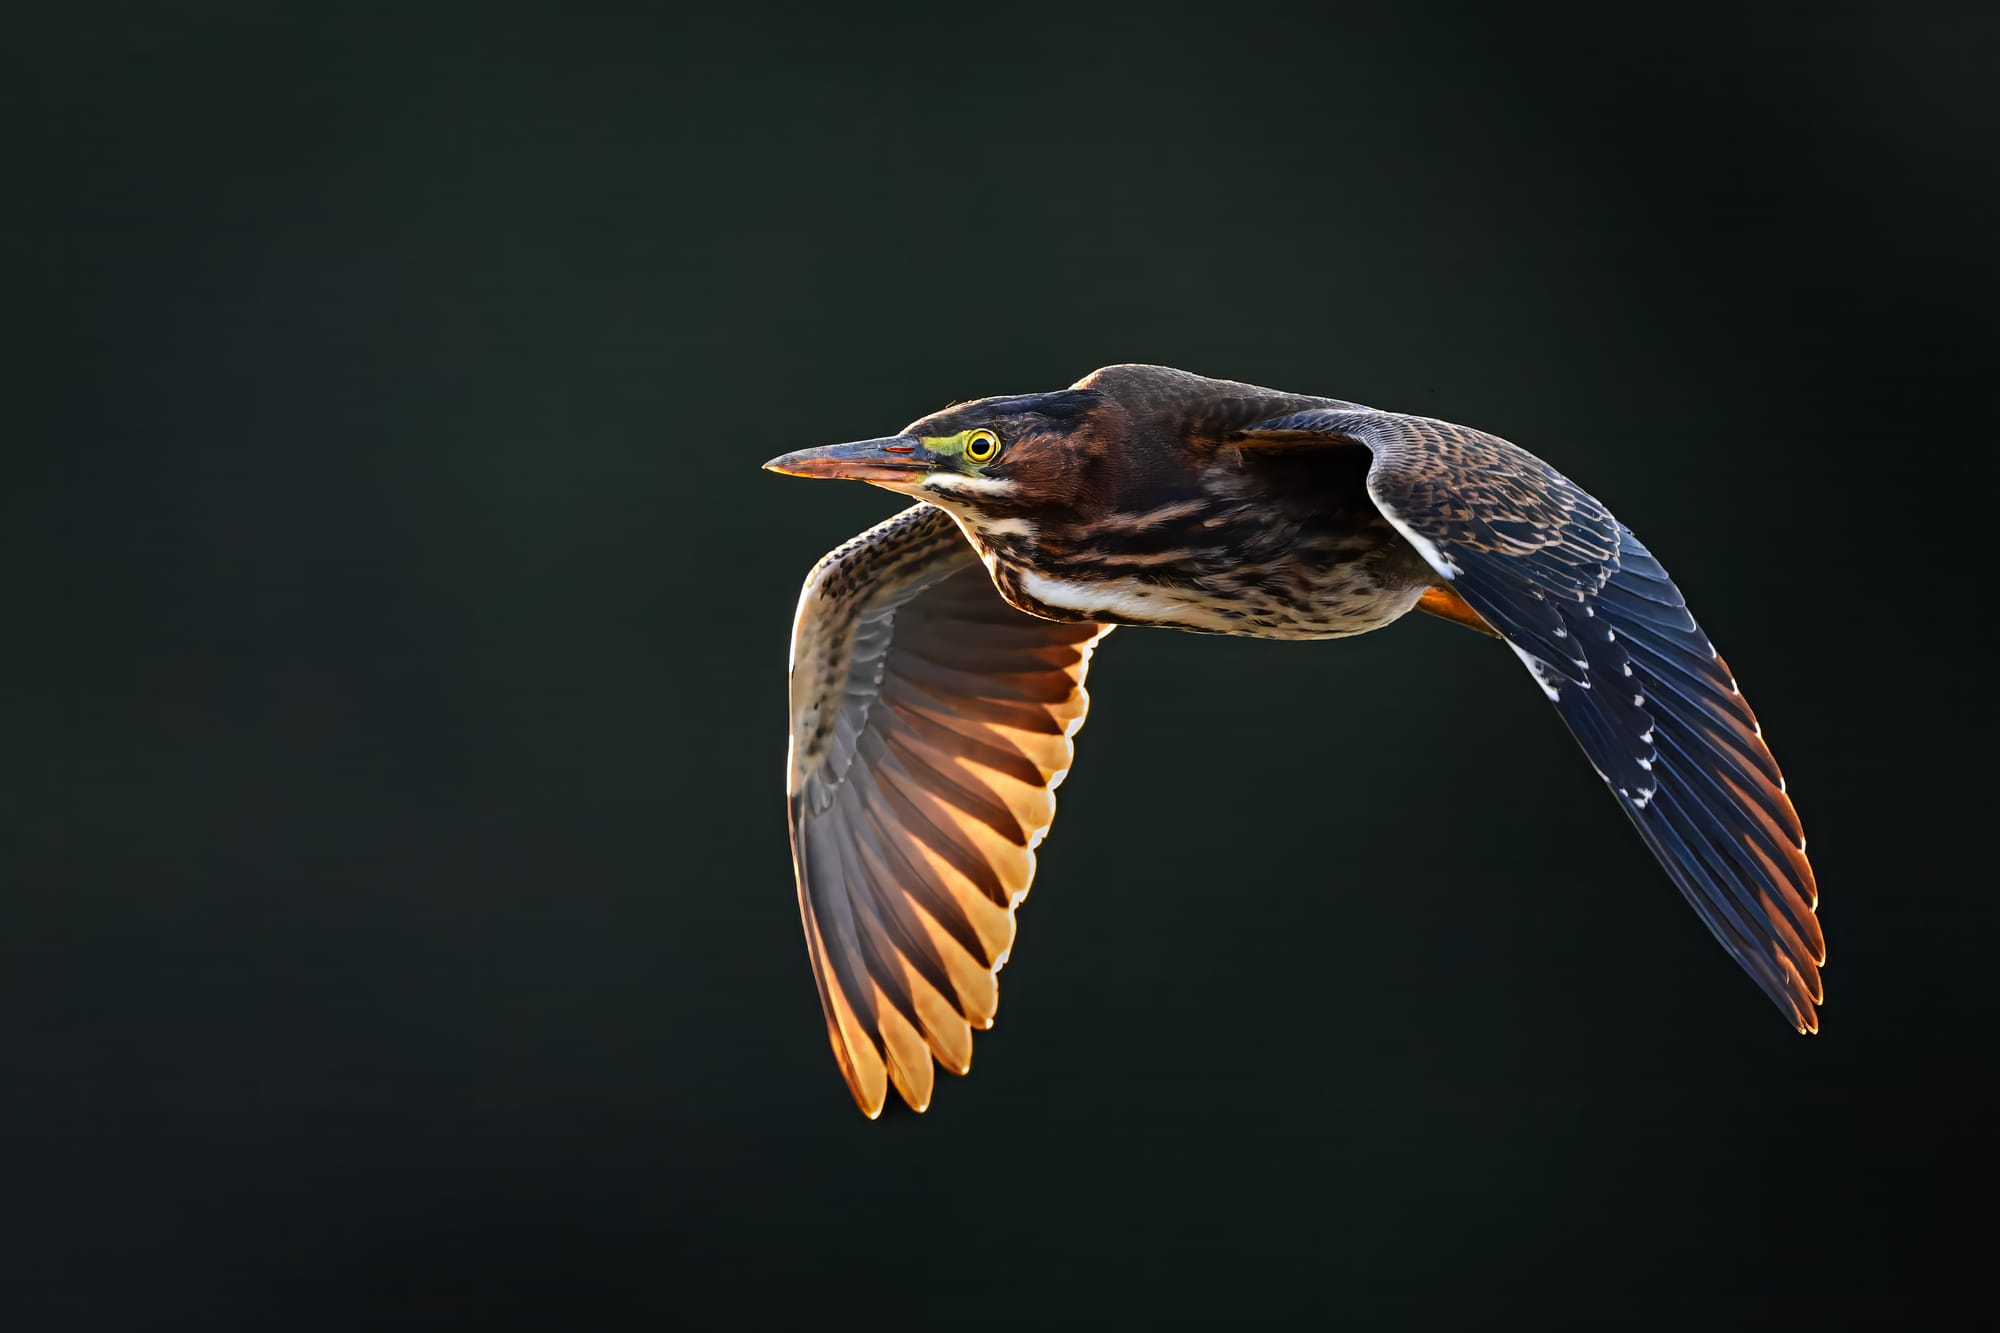
Transitional image showing the difference between a high noise image and a cleaned image of a Green Heron in flight.
Taming the Noise: Why High ISO Isn’t a Dealbreaker Anymore
High ISO used to ruin wildlife shots. Now? It’s just another tool. In this walkthrough, I show how I tame noise step by step — using DxO, Lightroom, and just enough restraint to keep things natural.
High ISO is a fact of life in wildlife photography, especially if you’re chasing mood, drama, and atmosphere. Think golden backlight, soft fog drifting over water just before sunrise, or those fleeting bursts of sunset color. These moments don’t carry a bright sun or perfect light for exposures, and if you want to capture them, you’ll be pushing your ISO.
This is even more true if you’re not shooting with gear that costs as much as a used car. The good news? High ISO isn’t the death sentence it used to be. Today’s cameras and smart post-processing tools give you the freedom to shoot in low light without fear. You can get stunning results using a relatively affordable high-aperture super telephoto lens. No need to mortgage your future for an f/2.8 for f/4.
In this post, I’ll walk through how I manage noise in my own workflow and share a few favorite examples, including some keepers shot at ISO 22000.
The Tools
We’re going to talk about a few tools in this one. Don’t worry if you don’t have them all. Honestly, you probably don’t need them. Lightroom alone does a great job these days. But in the interest of showing my full process and the tools I use, here’s what we’re going to talk about:
DxO PureRaw
Probably the best tool out there for very high ISO noise reduction. I’m yet to find anything that looks as natural or preserves as much detail. It’s usually my first stop when I know I’m working with a tough file.
Lightroom Classic or CC
Really fantastic middle ground. Anything under 10k ISO, I basically just work out of Lightroom, which is kind of my home base anyway. I never put the noise slider over 45. Your results may vary, but that’s my line.
Topaz
For me, Topaz is a finishing tool only. I think it’s way too heavy handed up front with noise. But if after DxO and Lightroom I still have some grain I want to clean up, and I plan to print on a super glossy paper like Pictorico, I’ll use Topaz as a last pass on a very low setting.
To the Technical Bits
Before we get into workflow, there are a couple of technical things worth mentioning.
The first one might seem obvious but just in case, lower noise means less work later. Always adjust your shutter speed for the situation and try to keep ISO manageable in the field. I know that isn’t always possible but it’s still the first line of defense.
Second, the more overall pixels you have, the easier this process gets. If you’re cropping away 90 percent of the frame, there’s just not going to be enough left to preserve fine detail after noise reduction. File quality matters with denoise.
For this comparison, I took one of my high ISO shots and copy pasted the final settings from the finished image onto each version without noise reduction. That way we’re looking at a consistent baseline before and after processing.
Lets Walk Through an Edit
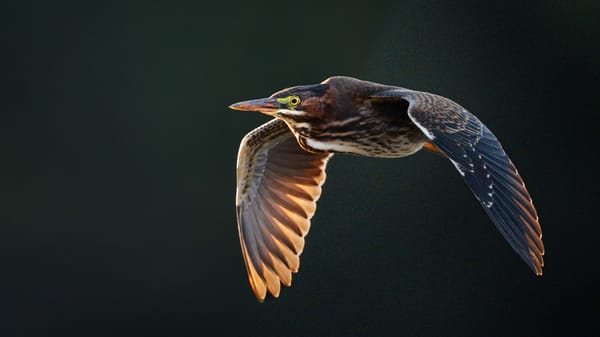
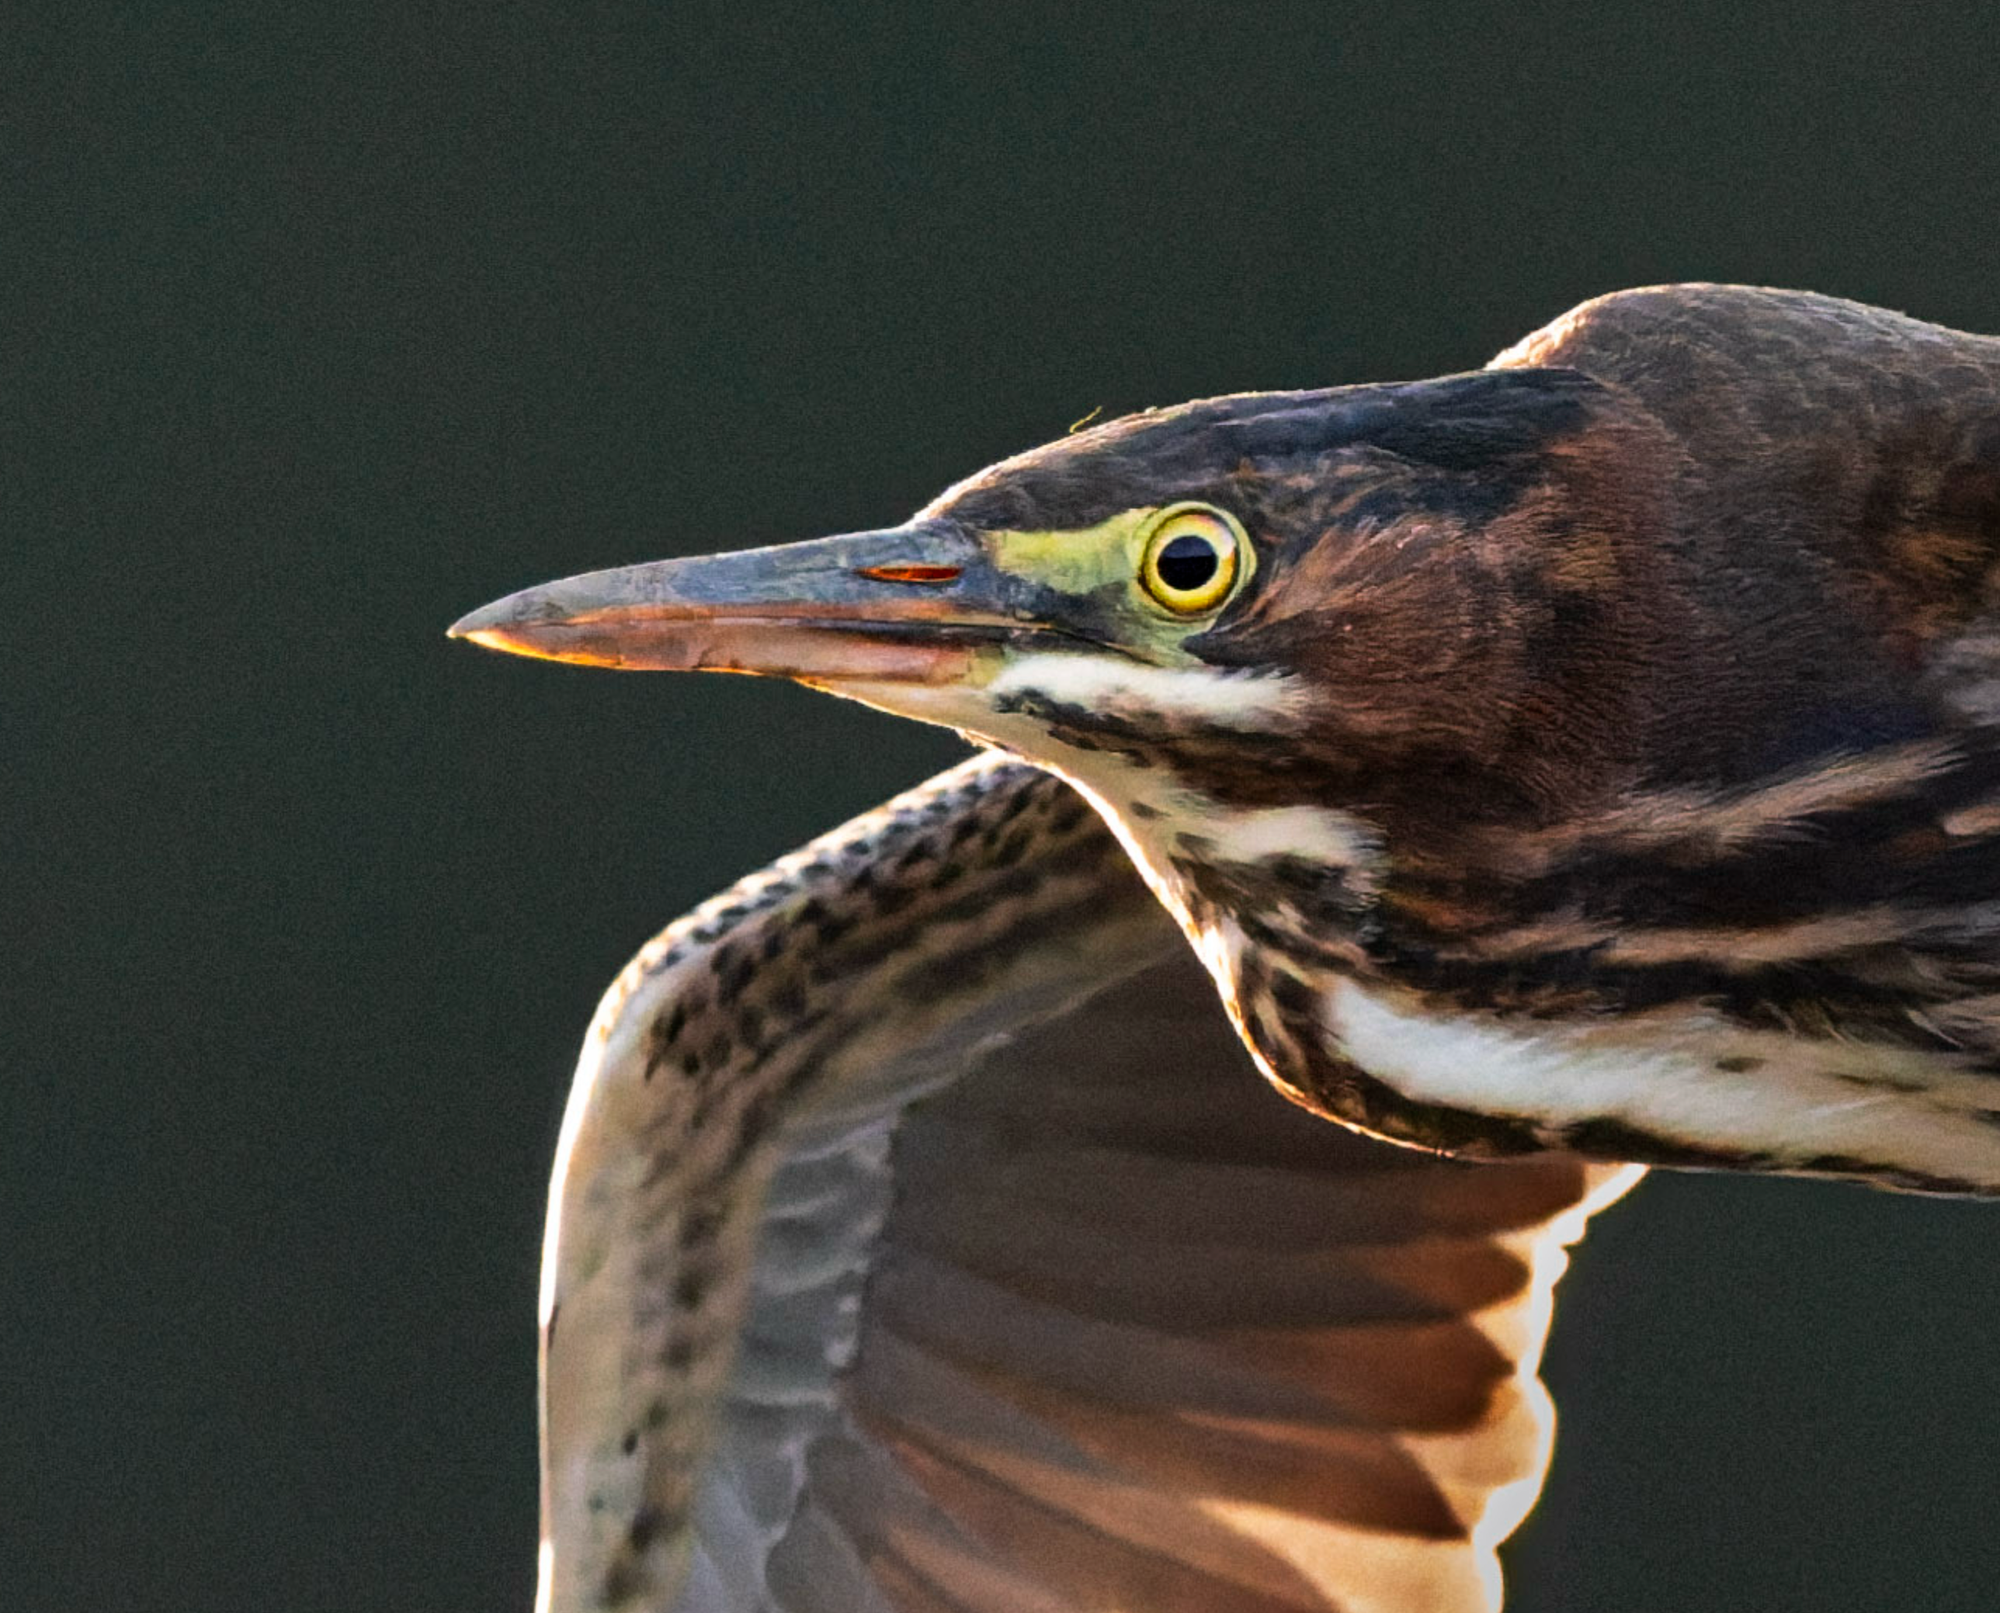
Green Heron RAW: ISO 22800
So you can see in the above image, I have plenty of fine detail, I did crop a bit but there is more than enough space left. Even edited it looks ok but it is quite noisy. Heres a zoomed up shot:
ISO 2200 zoomed in, noisy
So with this level of noise, my first step is DxO PureRaw 5. Again, Lightroom will give you passable results, but I personally find DxO on super high ISO like this to just work better. It looks more natural, maintains feather detail well, and even does some lens corrections. I use DeepPrime 3 and pretty much leave the settings at default.
Here’s the result:
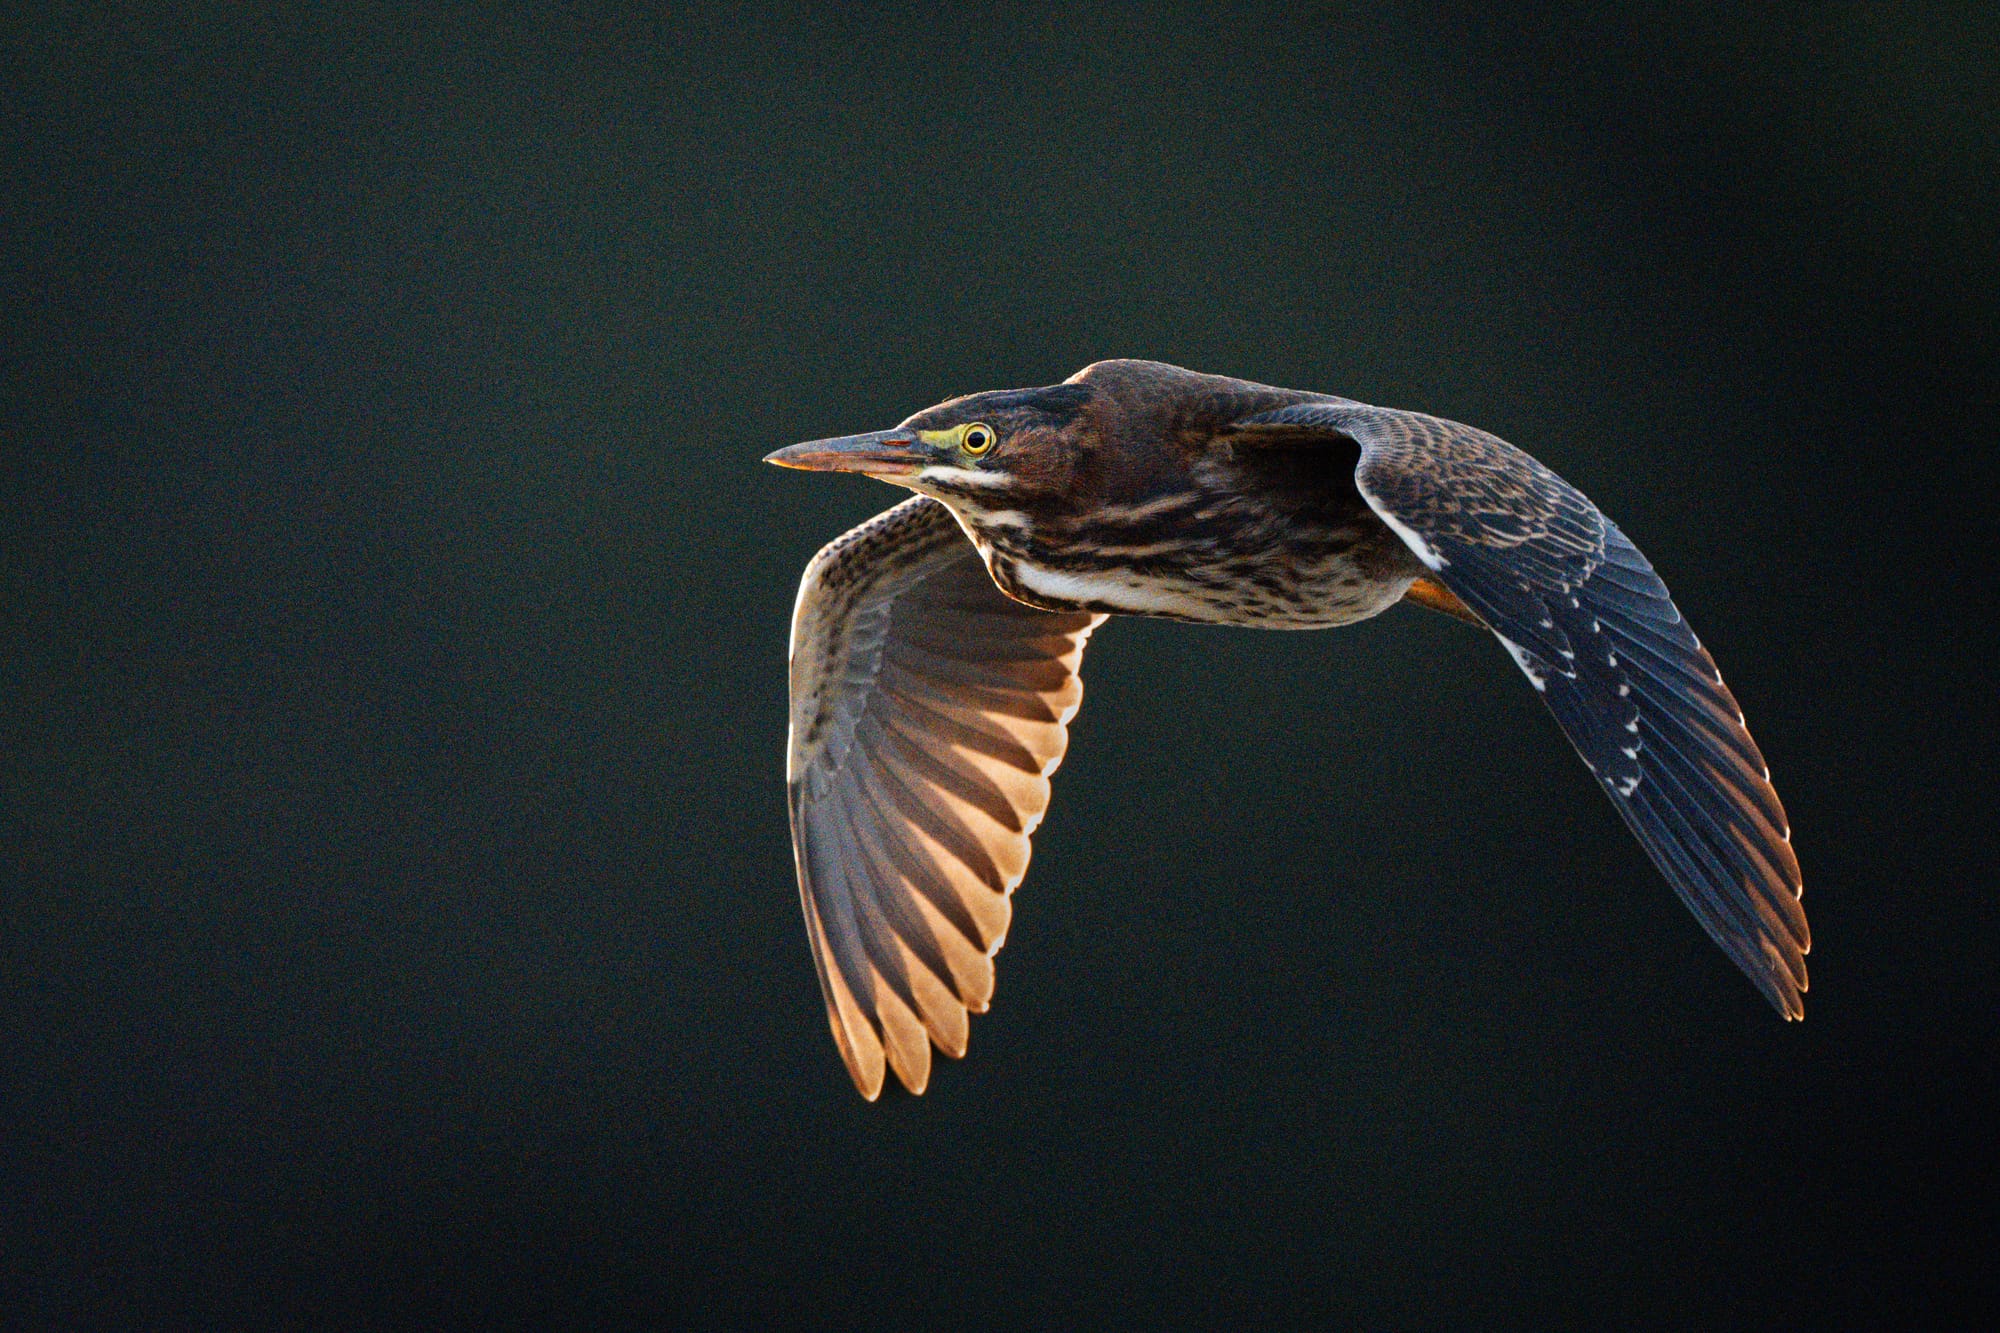
Green Heron after DxO PureRaw 5
Already this is a passable image, the texture and feather detail is there, it looks solid, its a usable image just from this but lets zoom in:
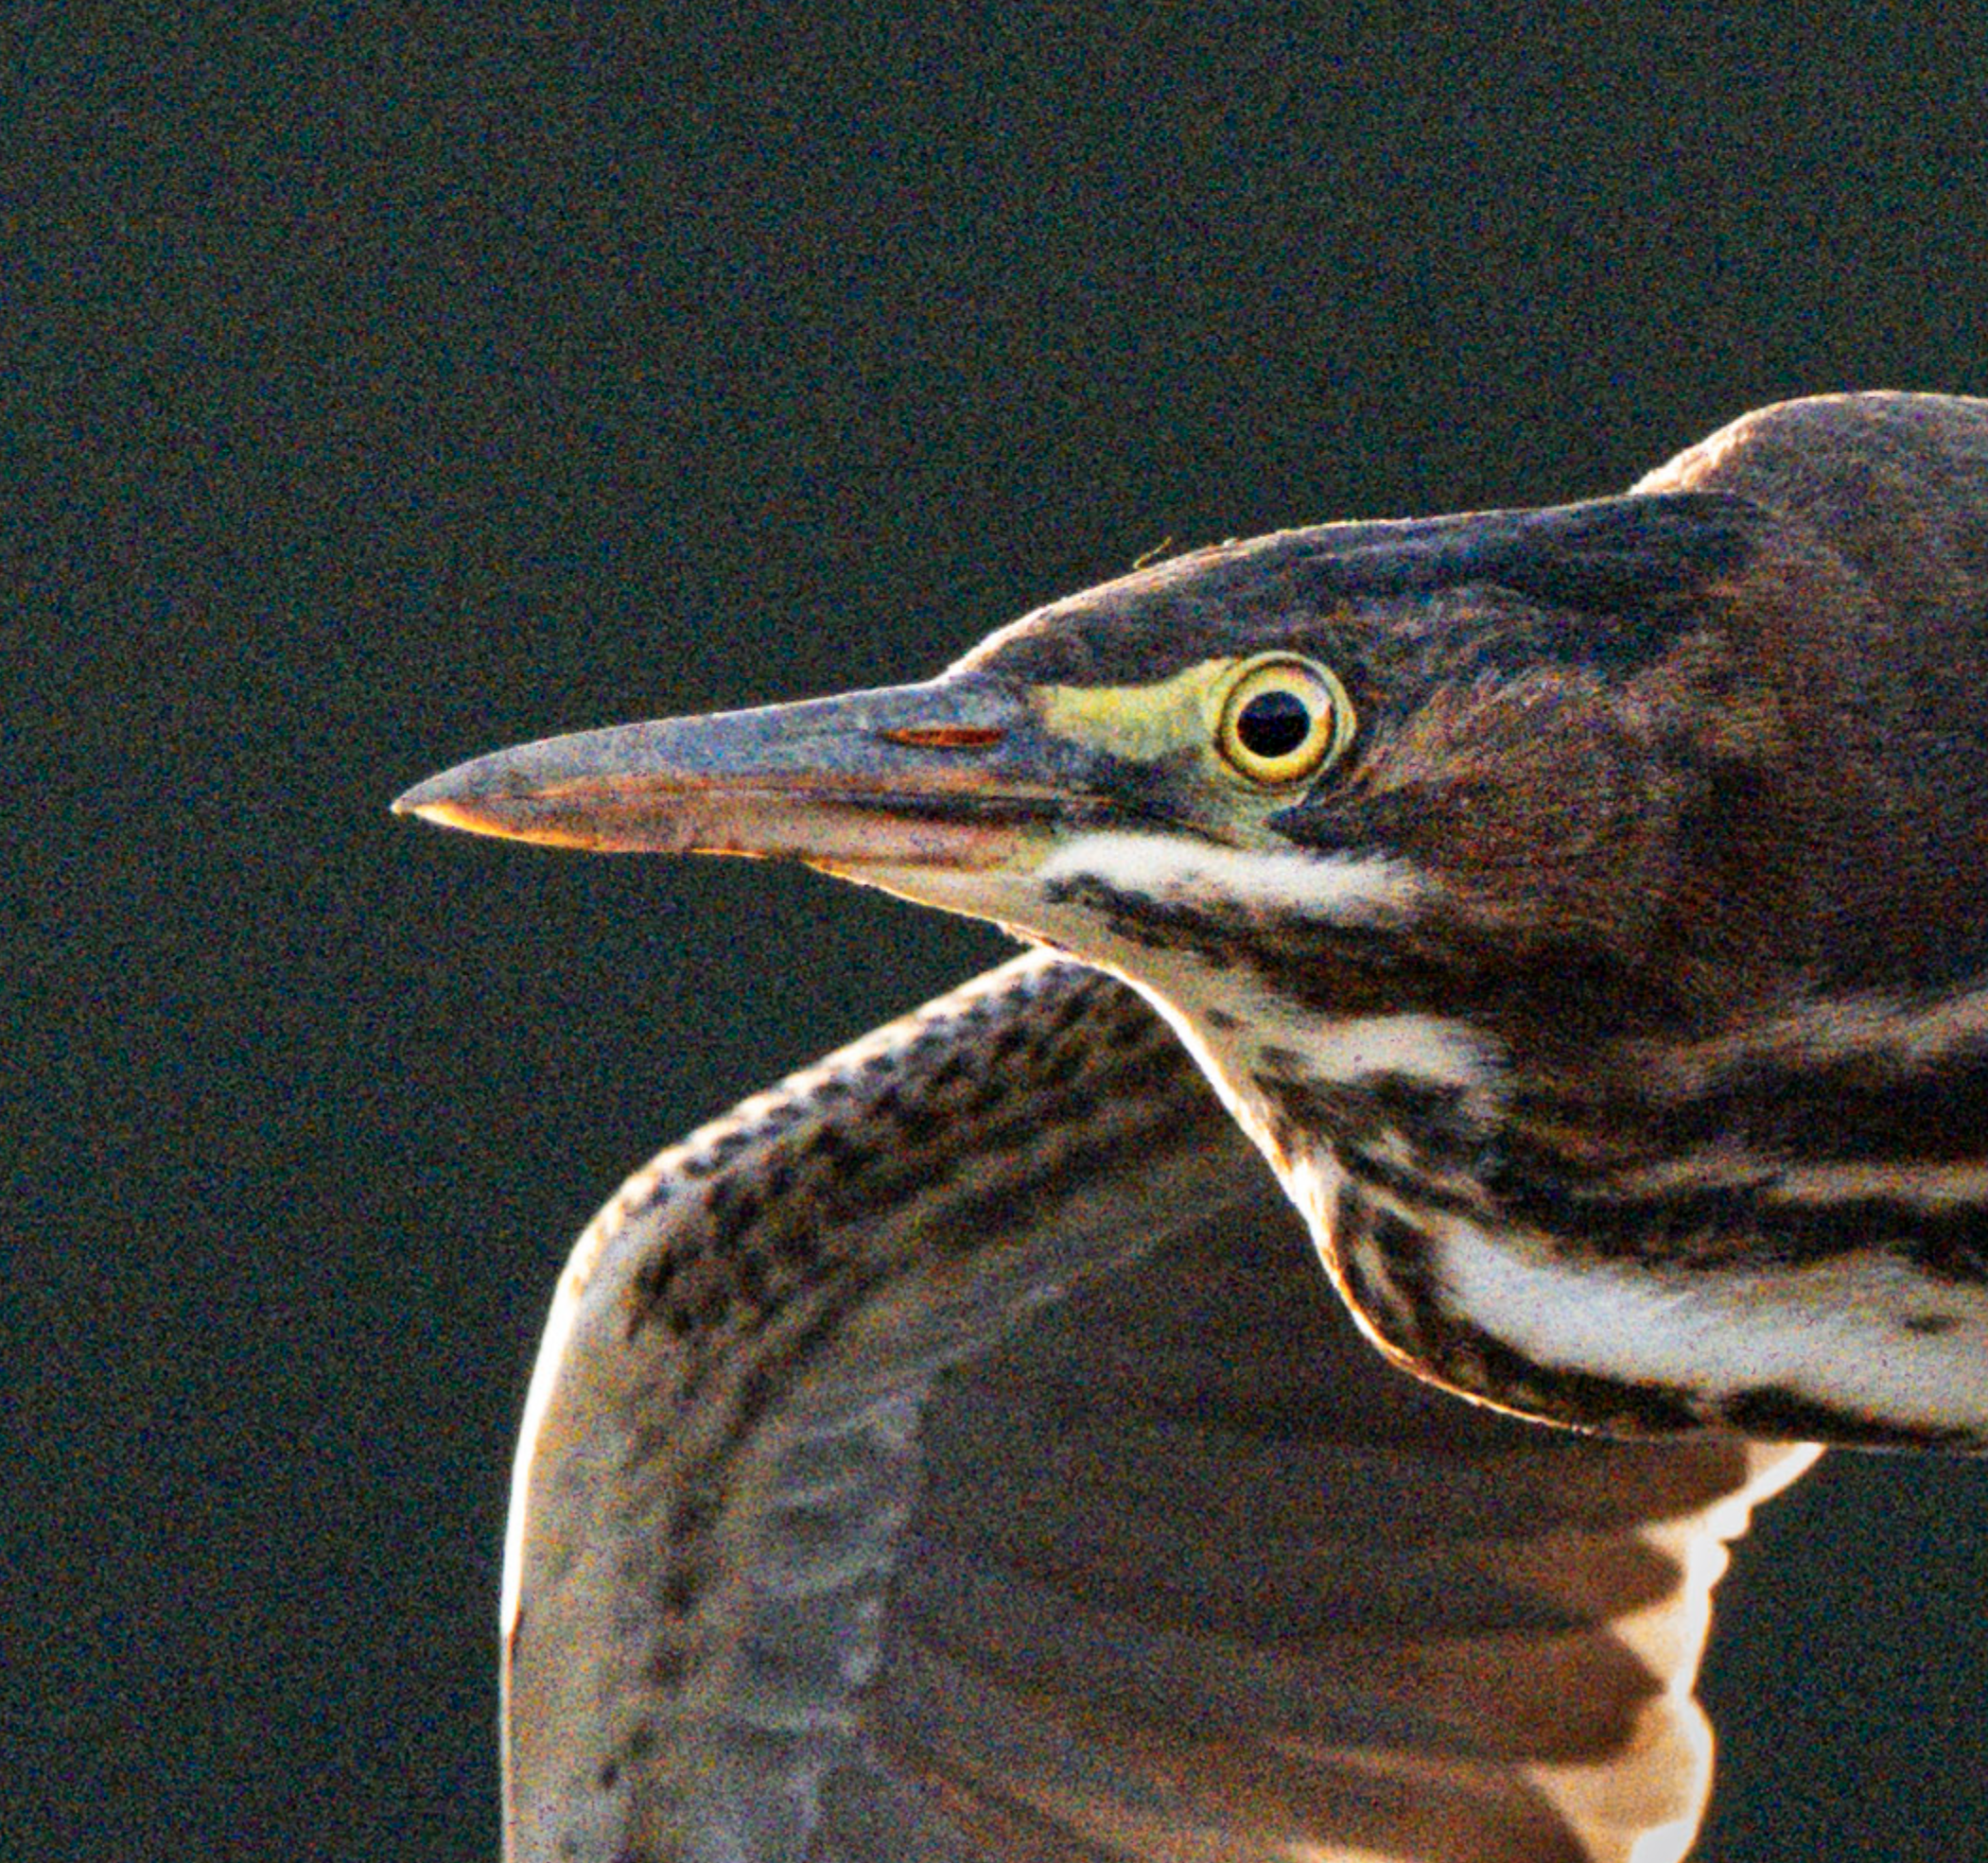
DxO PureRaw with DeepPrime 3
If you look close and blow this up, it’s definitely passable as an image. Maybe even great if you like that subtle grain. I tend to print a lot on very glossy Pictorico Japanese film stock though, and I find that slight grain on such a smooth paper just doesn’t work.
Plus, I think we can do a little better without making it look artifacty or fake.
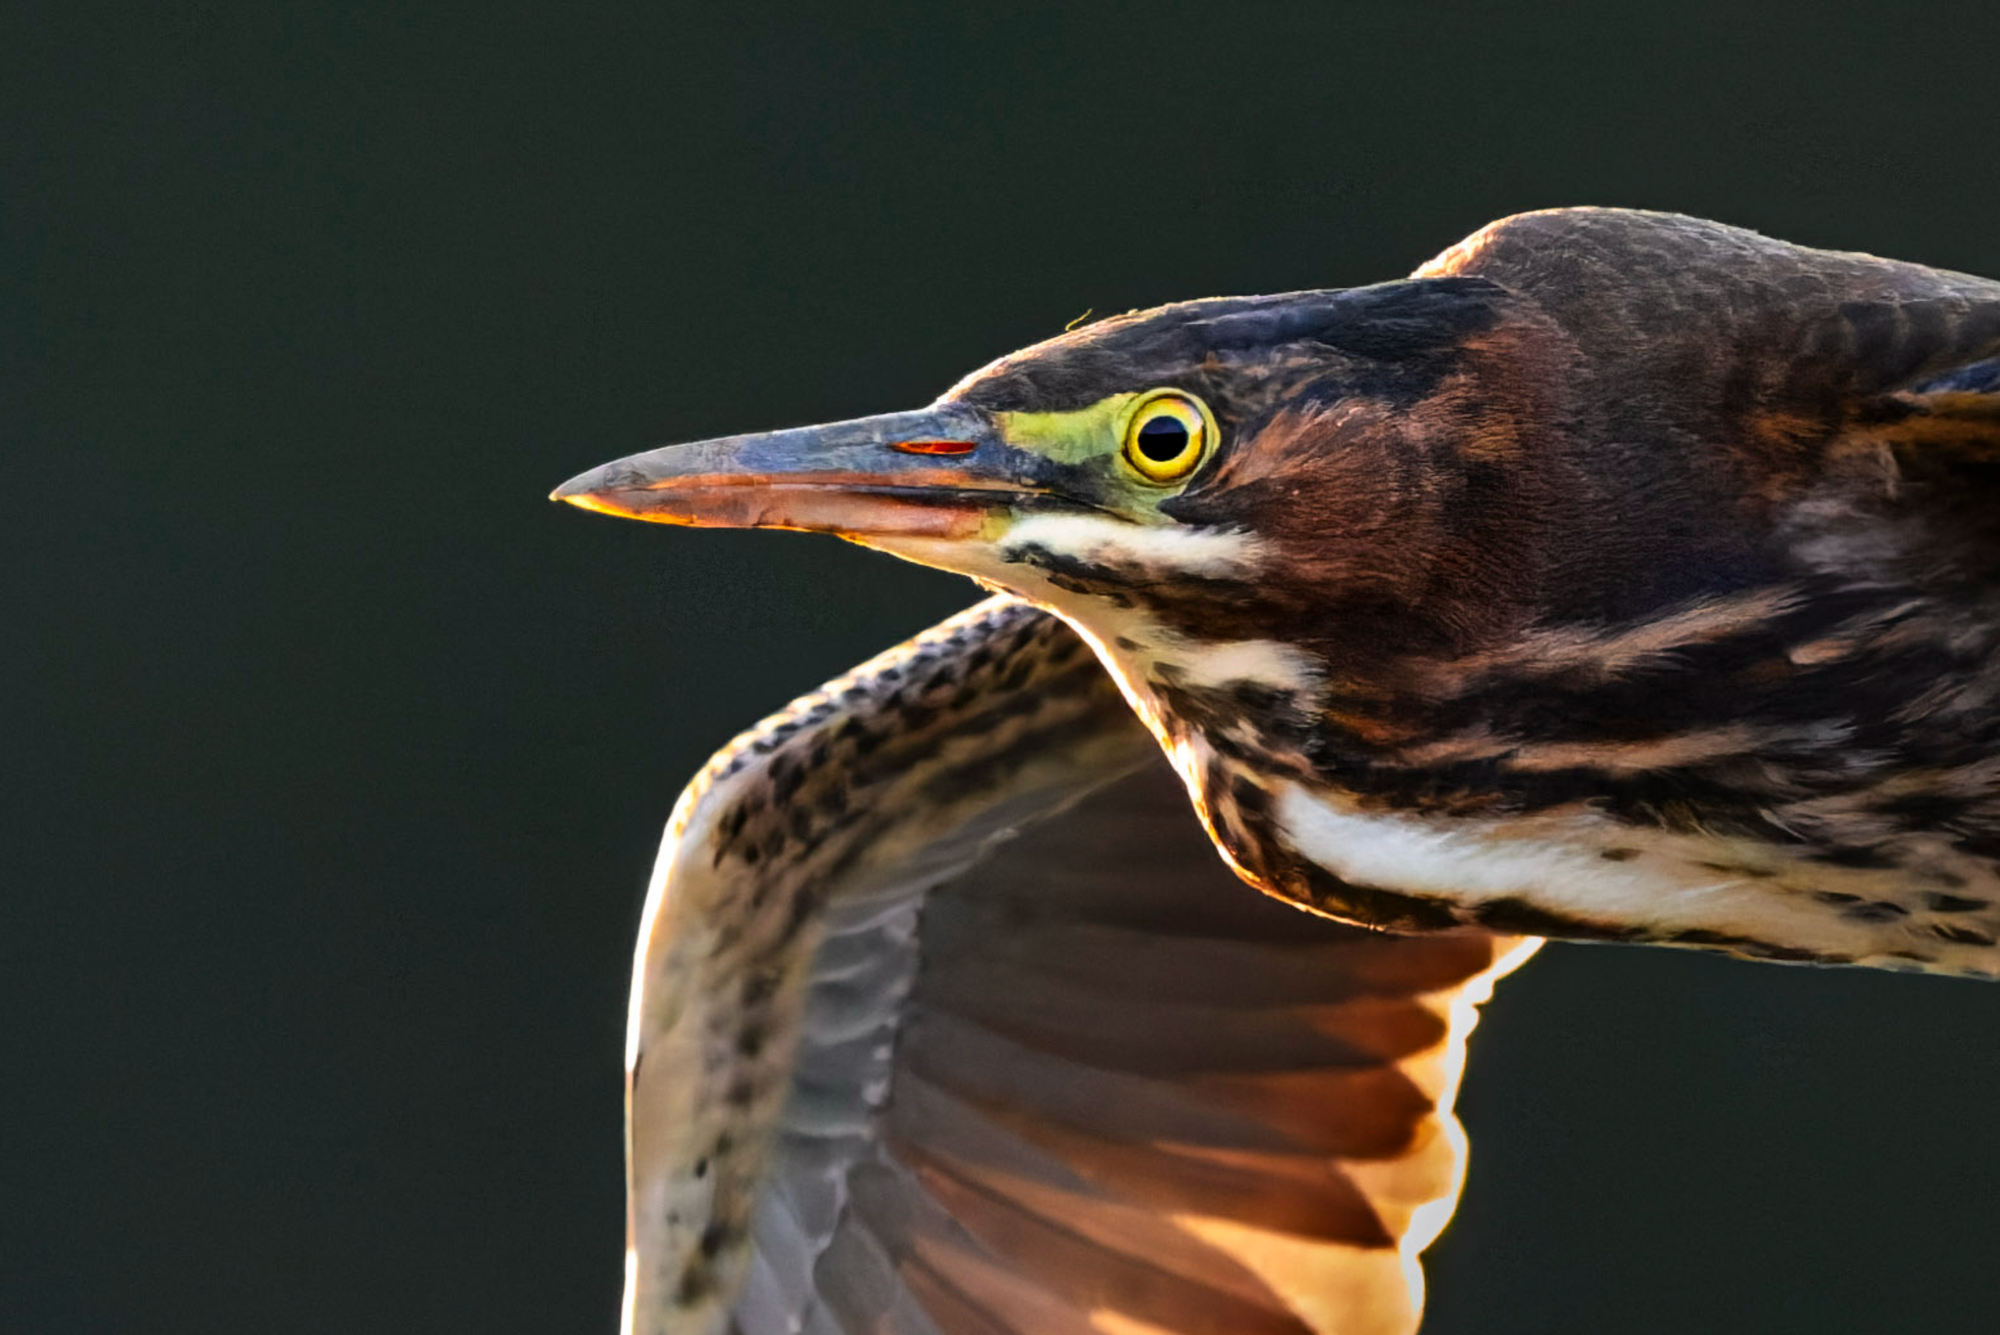
That’s when I’ll sometimes run a second pass using the built-in Lightroom denoise. Never above 45, and often lower for something like this. Heres the result:
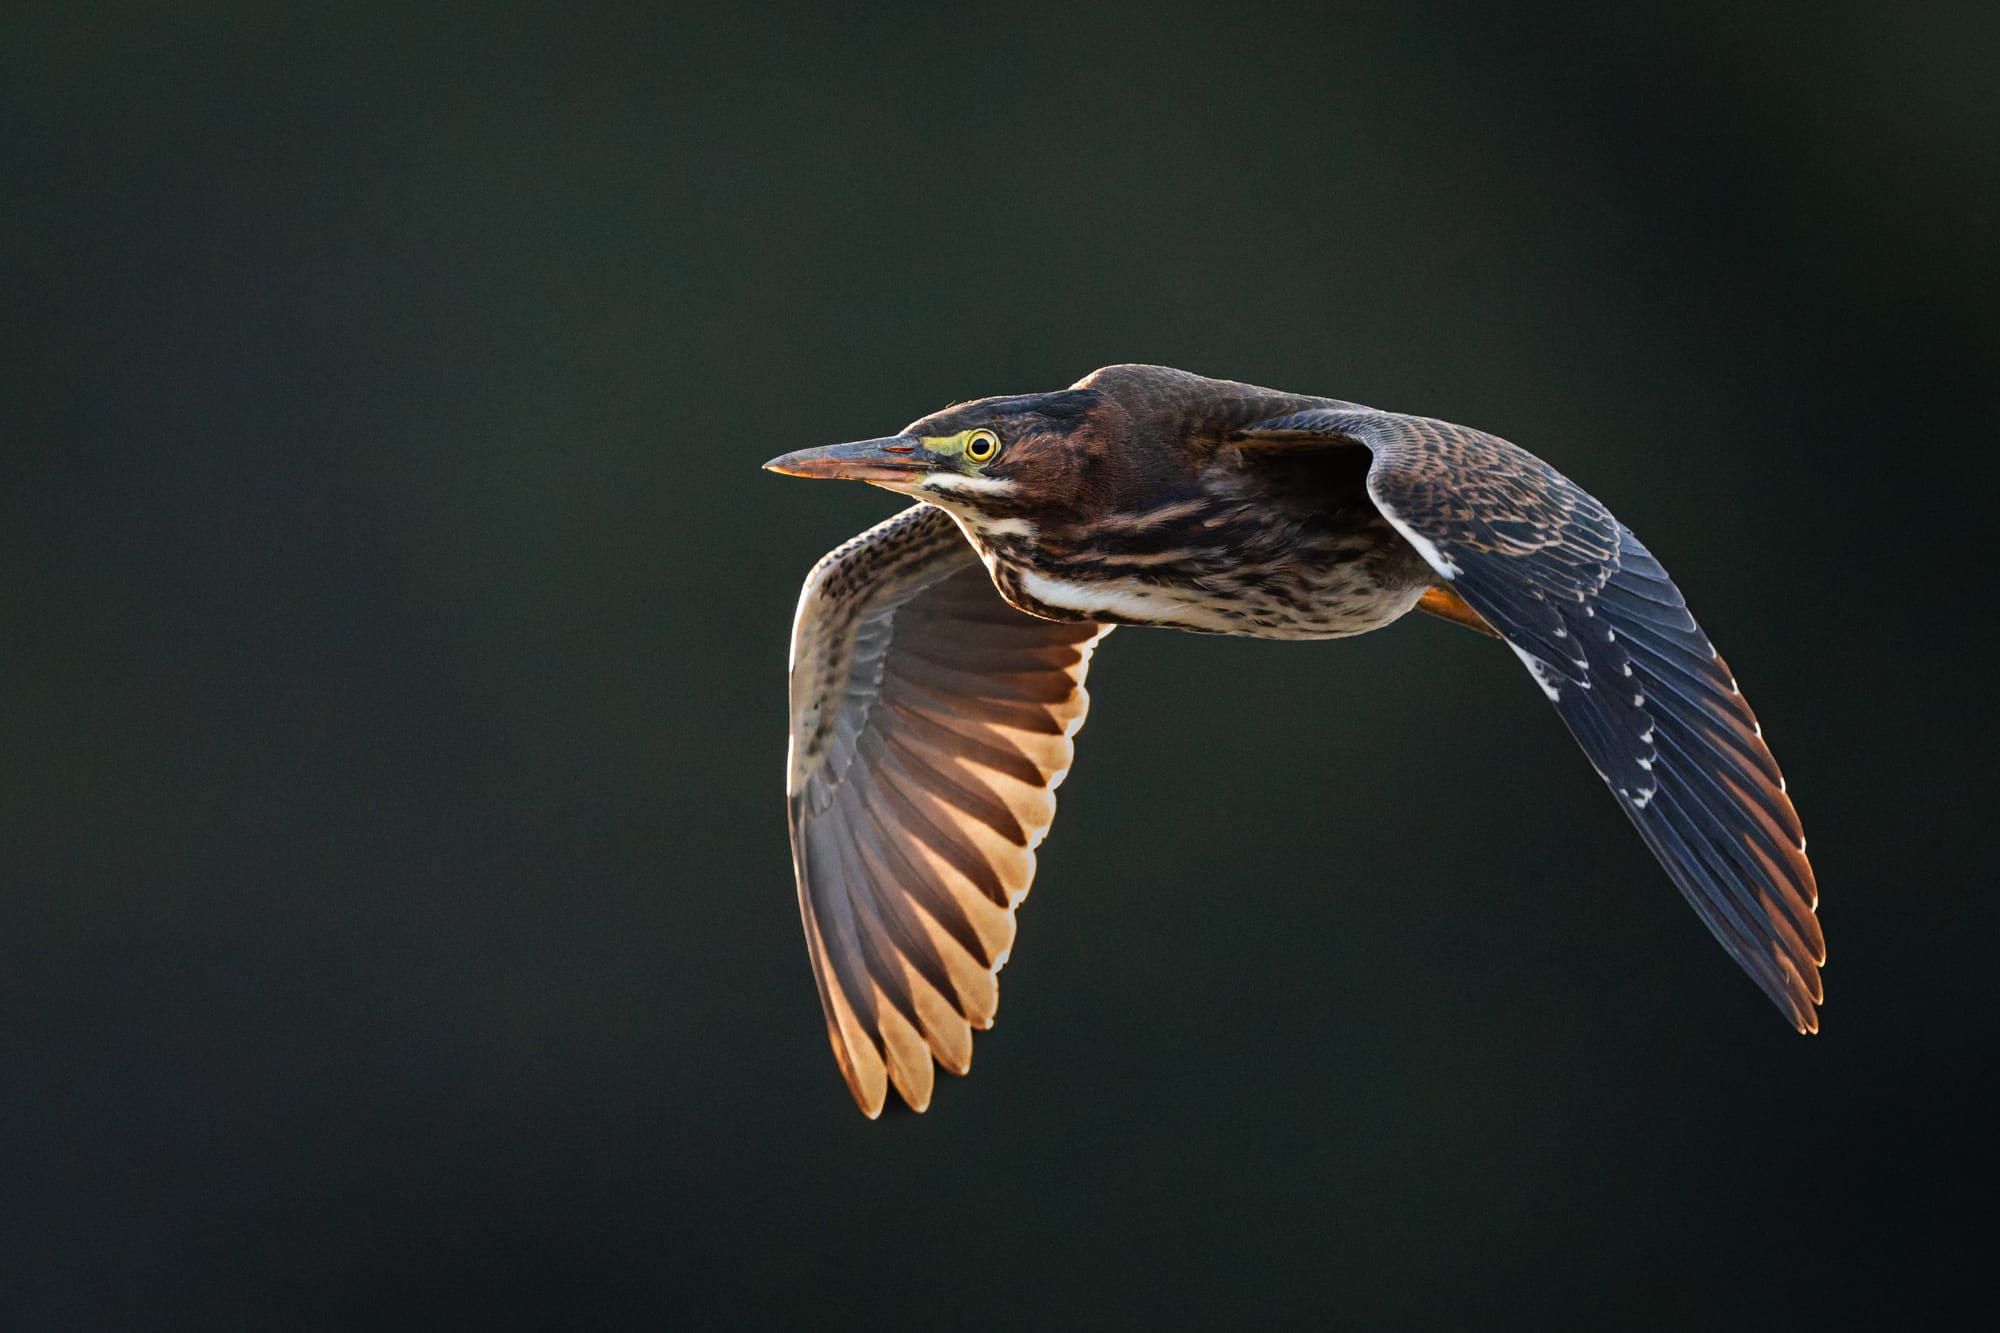
Green Heron - DxO PureRaw and Lightroom Denoise
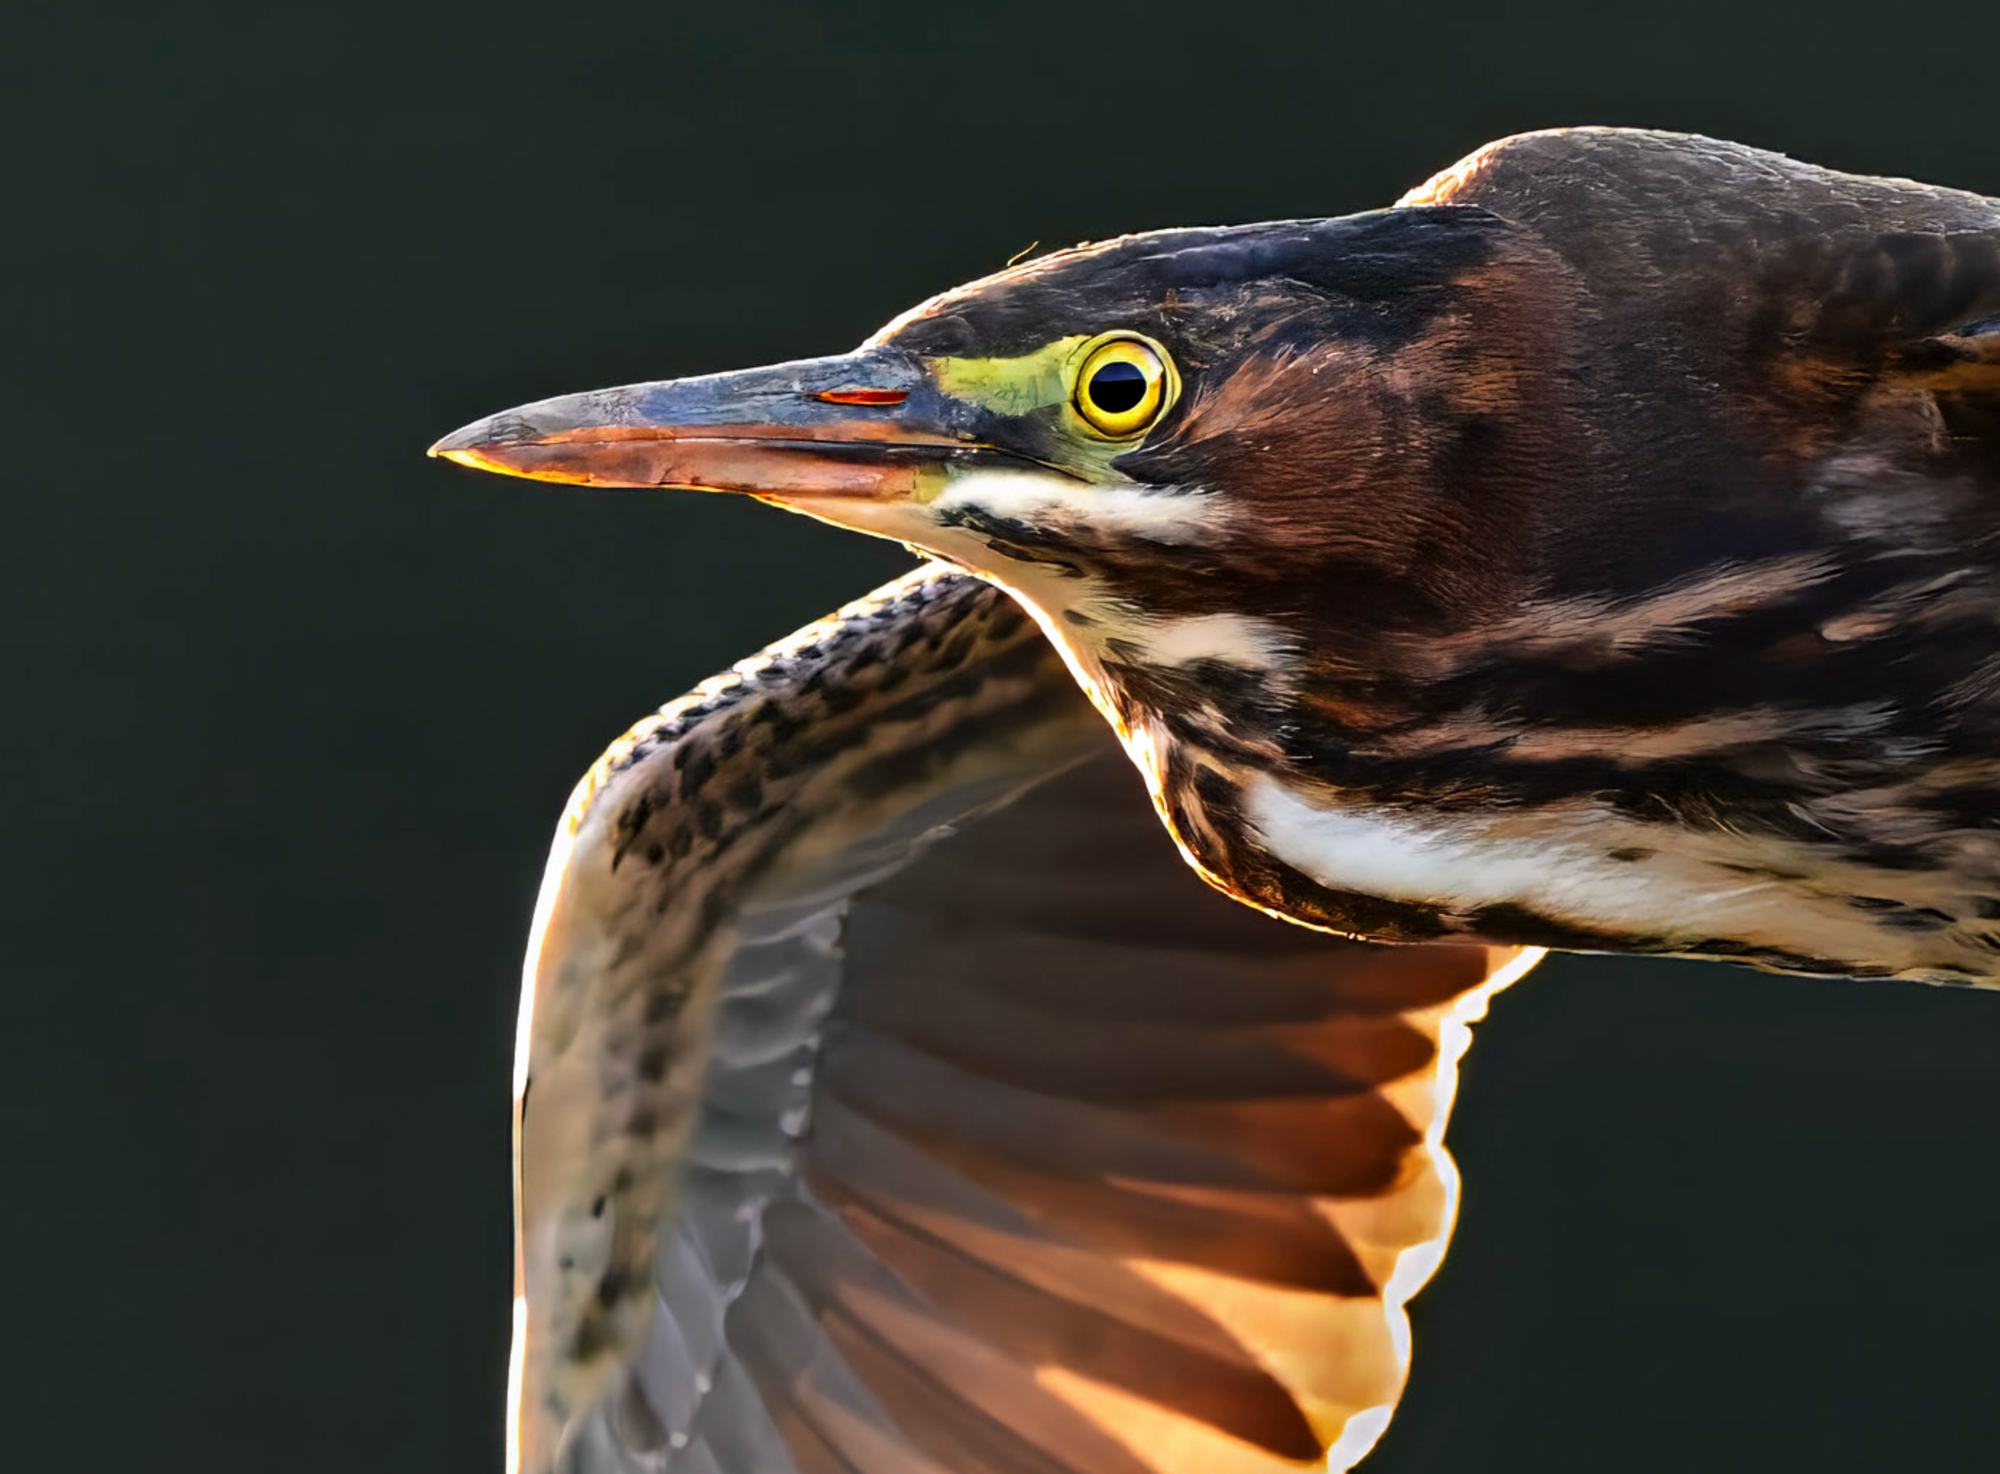
Already you can see that shadow grain cleaned right up, but it still looks natural overall. Plenty of detail, no fake plasticky look. Let’s zoom in and make sure:
DxO PureRaw with Lightroom Denoise
Yep, realistic grain, not enough to mess with a gloss print, and no loss of detail. At this stage, I’d say we’ve tamed the noise and this one is done. No need for Topaz.
Honestly, I almost never use all three tools. I’ll go DxO to Lightroom, or Lightroom to Topaz, depending on the situation and how aggressive I need to be. Either way, I try to keep the overall denoise sliders as low as humanly possible.
I’ve found it’s better to clean up an image bit by bit instead of cranking one slider and doing it in one pass. That way the tools are targeting just the noise, not wiping out detail or filling things in with weird fake texture. It’s a slower method, but it feels a lot more natural to me.
Doing what I don't suggest, because why not
So thats how I manage noise, little by little with a multitude of tools. But just for fun I'll toss this in topaz and crank it so you can see what I don't recommend doing.
ALL THE DENOISE!!
I just want you all to know doing this hurt me, like really truly hurt me. I'll zoom in so you can see why:
Mmmmm glassy
It’s too sharp. Too smooth. Too plastic. Real life doesn’t look like this even a little bit.
I suggest avoiding this look. It might pop on a phone screen, but the second you print it, it’s going to look super processed and fake.
Lets Wrap This Up
Alright one more good example and then I'm out of here, I wanted to keep this blog short:
Another 20k ISO image, this time only using Lightroom's denoise
Alright I set out on this journey to teach y'all a few things and hopefully I have done that.
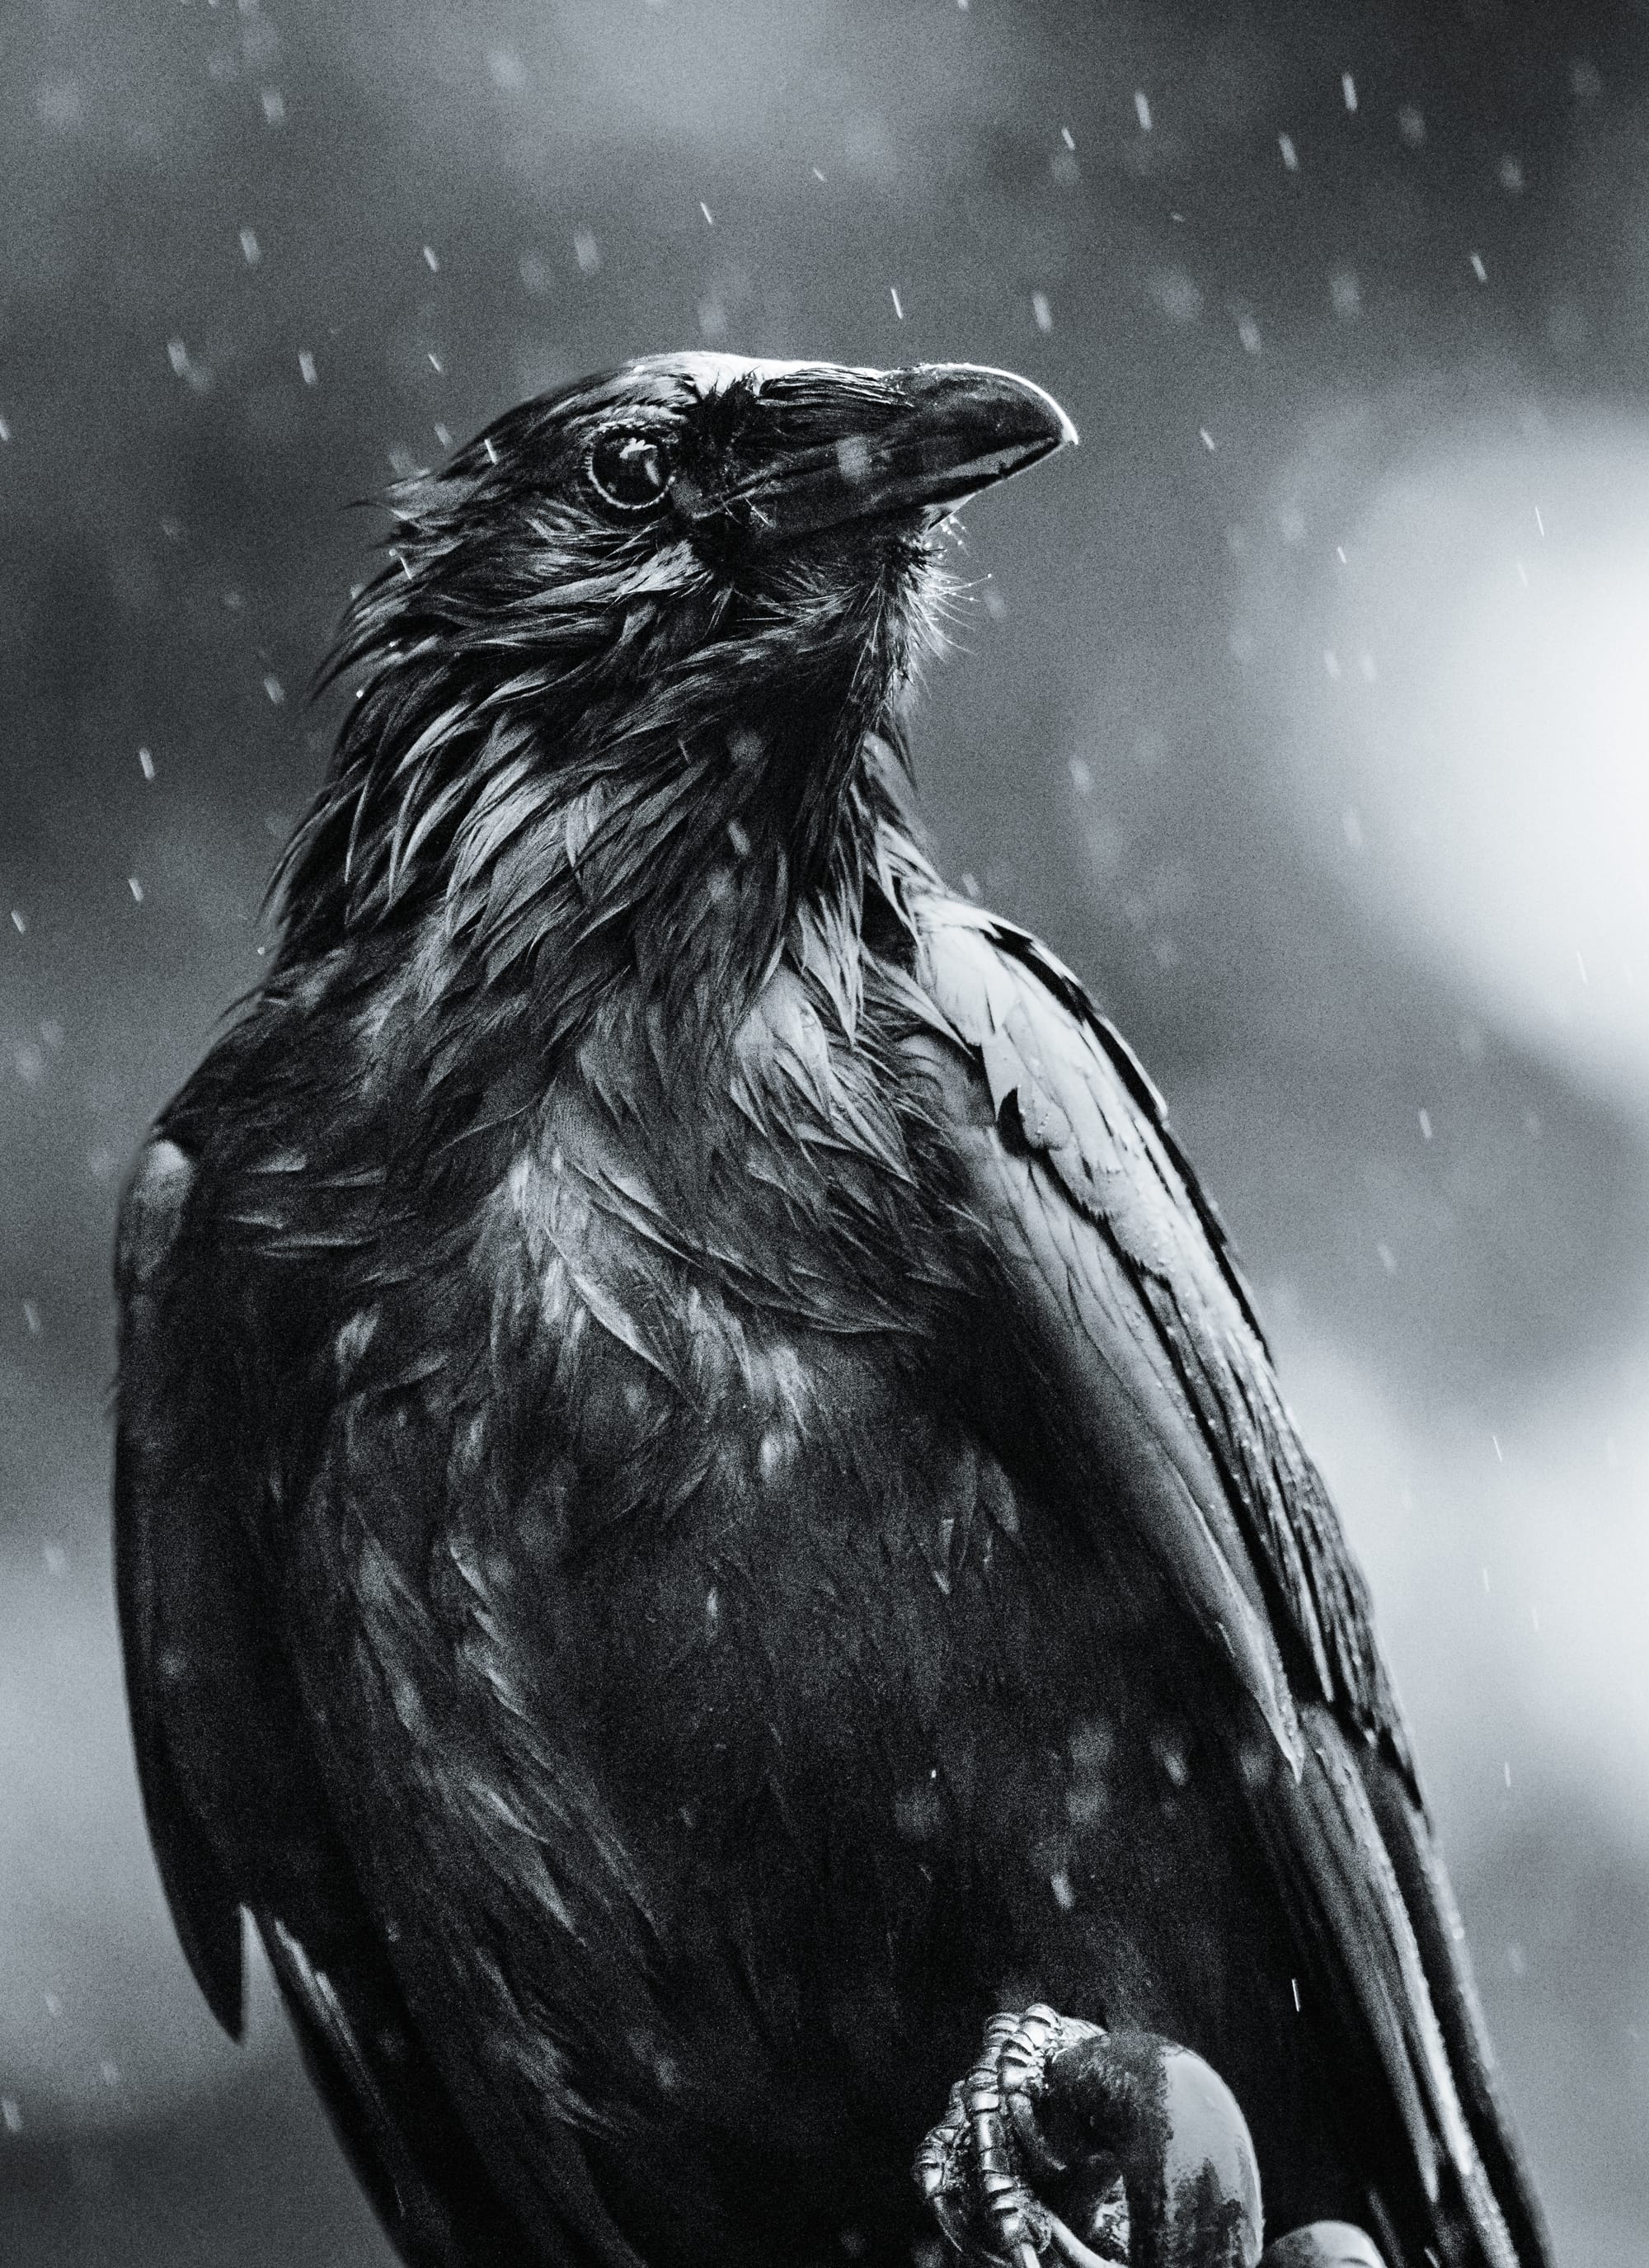
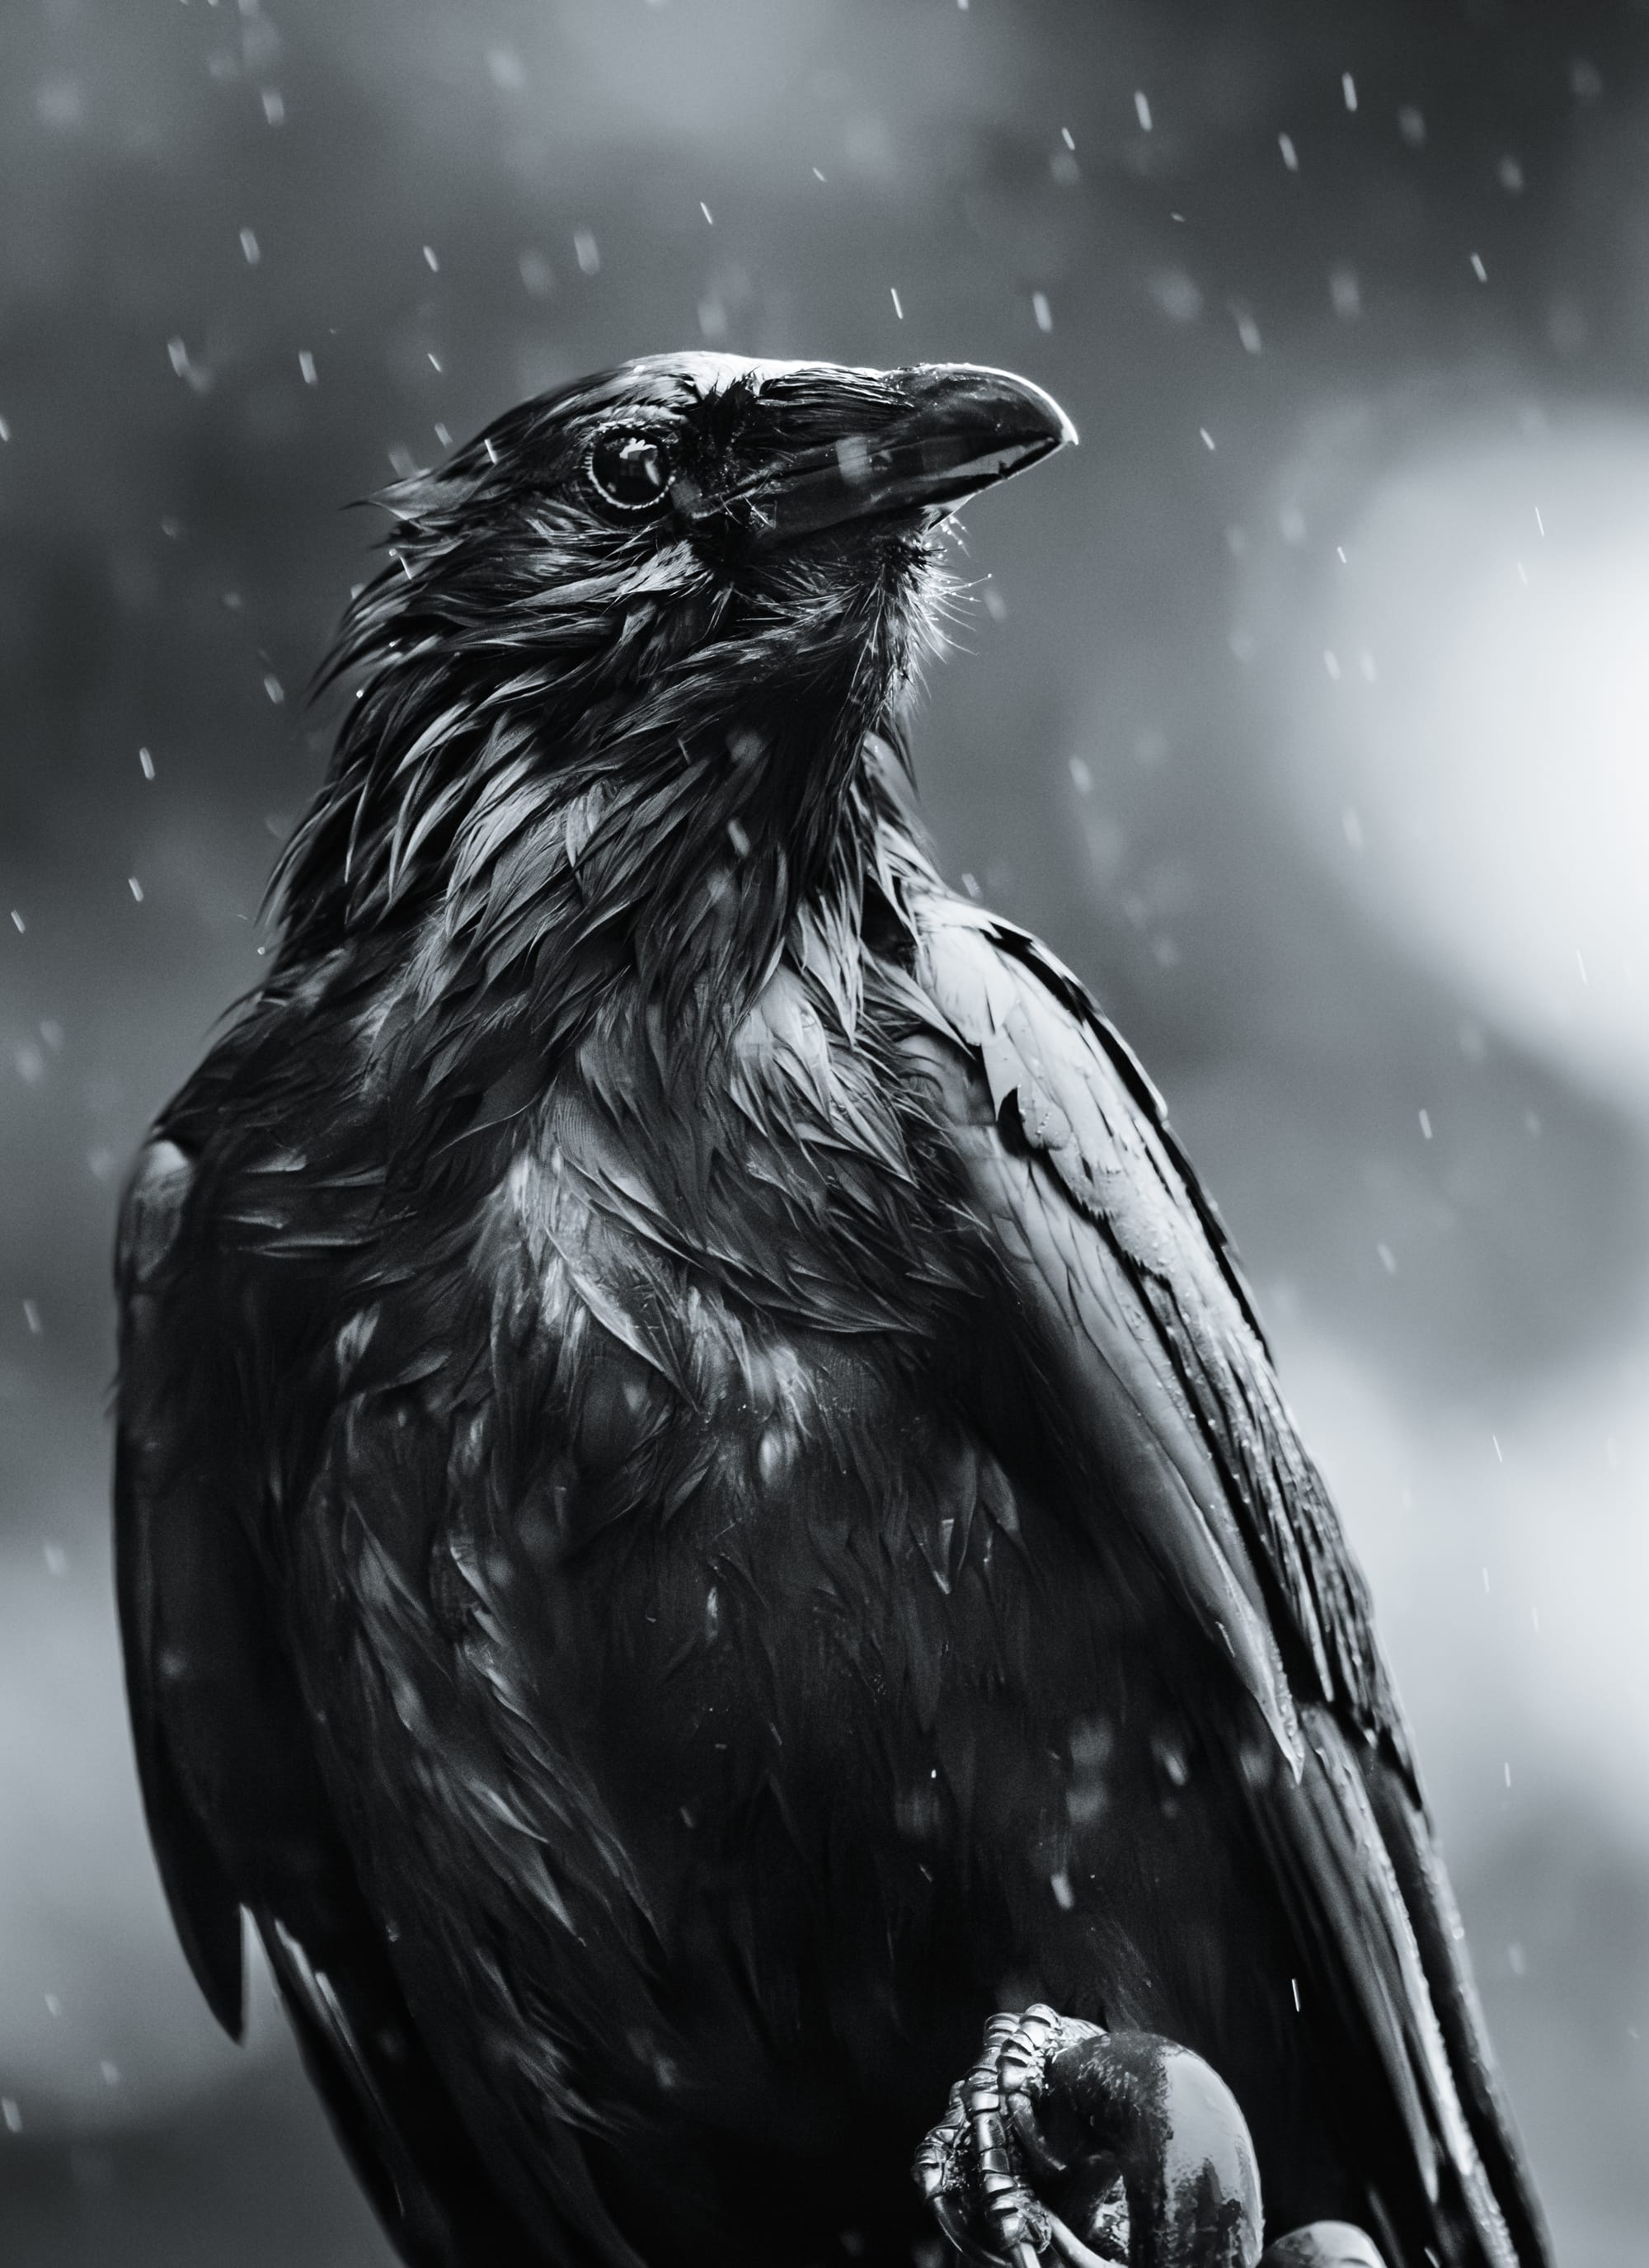
Don’t be afraid to use high ISO. It’s really not the end of the world. That crow image above? Shot at ISO 20000. It’s my most popular print, has ribboned at local events, and even got shortlisted in the Black and White category by Amateur Photographer of the Year.
The tools we have today are awesome. They make wildlife photography more accessible than ever. You don’t have to take out a second mortgage to get great results anymore.
Bonus tip: work on your images in small increments. Don’t overprocess, and never crank your sliders to 100. Or do. I’m not the boss of you. But personally, I think it looks fake and ruins a lot of otherwise great shots.
Oh one last thing, I manage noise first, before the edit. I do this for a few reasons, 1 so I can look at the before and after in lightroom for the rest of the edit, and 2 so I can see how the finished image will look, major things like NR I suggest doing first for this reason, it makes it easier to see the actual edit in real time.
If you found this helpful, informative, or maybe even a little funny, why not subscribe?
It’s totally free, and I post new blogs every Tuesday filled with tips, tricks, trip stories, musings, and whatever else I feel like talking about in the world of photography.
And as always feel free to check out my full works at shawnthomas.art
Sign up for Shawn Thomas Photography
Wildlife, landscapes & the stories behind the shots. New posts every Tuesday.